Mobile Device Integration
Process Flow Web Application
The Chattels valuation process should start on your computer and the Chattel web application. As the web-program opens you see a "Welcome" notification in the center of the screen and two orange buttons left.
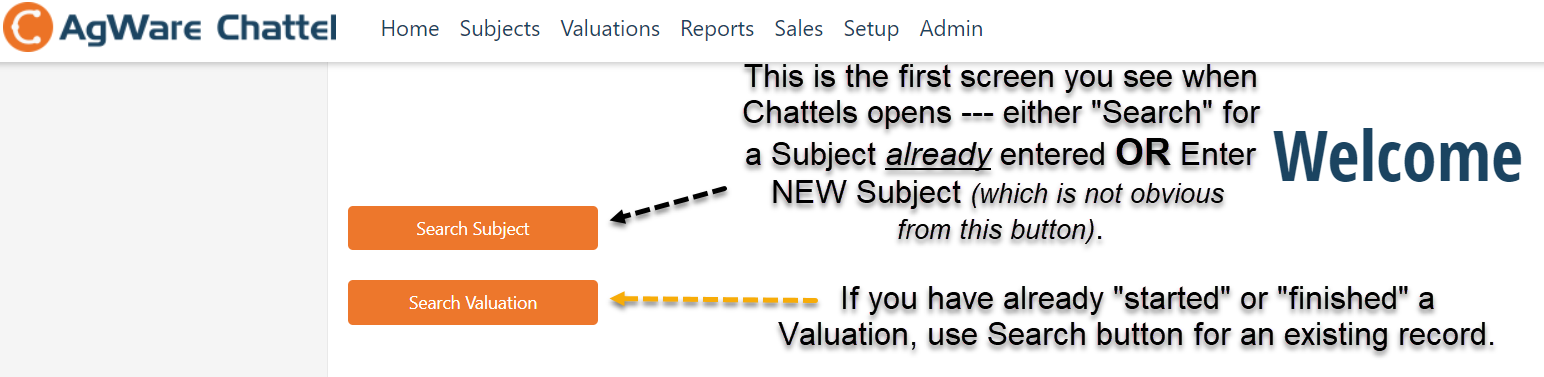
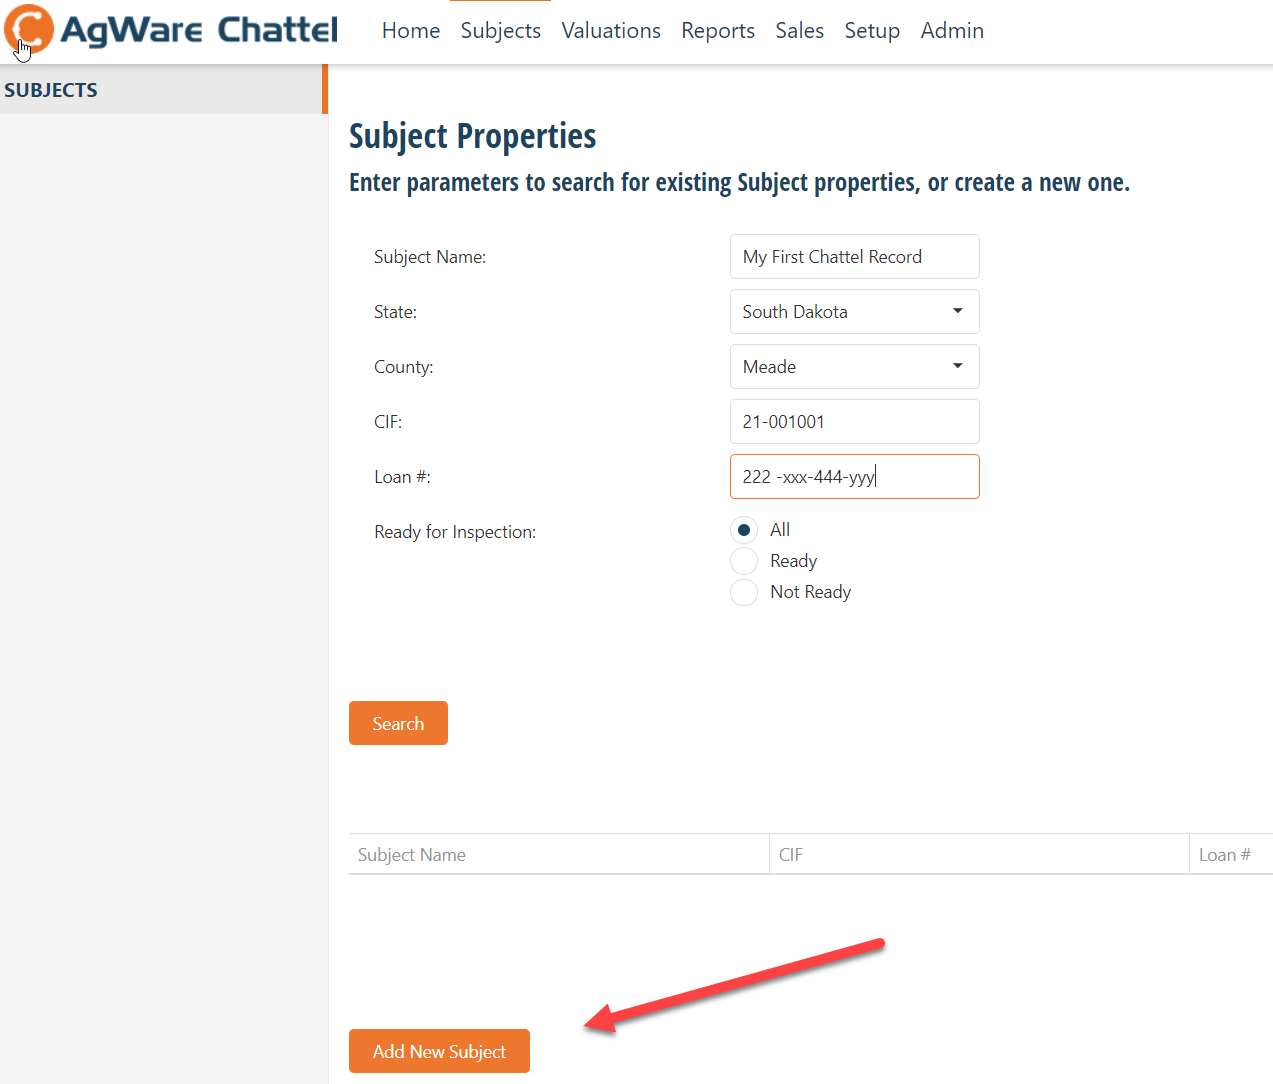
Search Subject Option: A second screen opens --- a SEARCH screens containing five fields and a "Ready for Inspection" delineation.
(NOTE: CIF = Customer Identification File; a manual entry for the user to link to customer's file location.)
CREATE a NEW Subject: Hit the "Add New Subject" bottom (bottom left at red arrow) RATHER than entering the subject search information in the first screen.
If you "Added New Subject", a second screen appears:
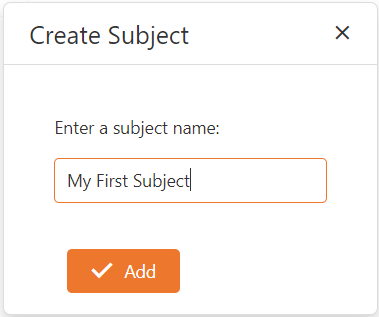
Hit the "Add" check mark after you named your subject ..... "My First Subject" is shown for the "subject name".
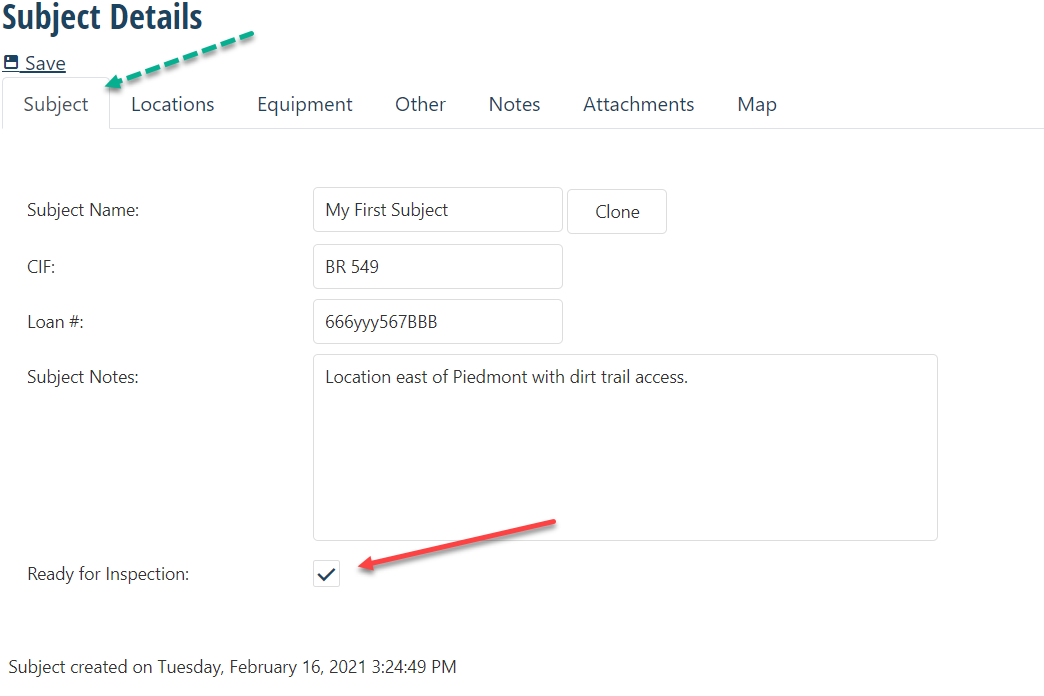
The Subject Identification screen appears (green arrow showing "Subject" tab), but the next entry came from your last screen labeled as "My First Subject". Enter the information known or needed, but more importantly check the "Ready for Inspection" box shown by the red arrow --- a critical step. That check-box allows your MOBLE devise to sync with this record for pictures and field notes from each individual chattel entry.
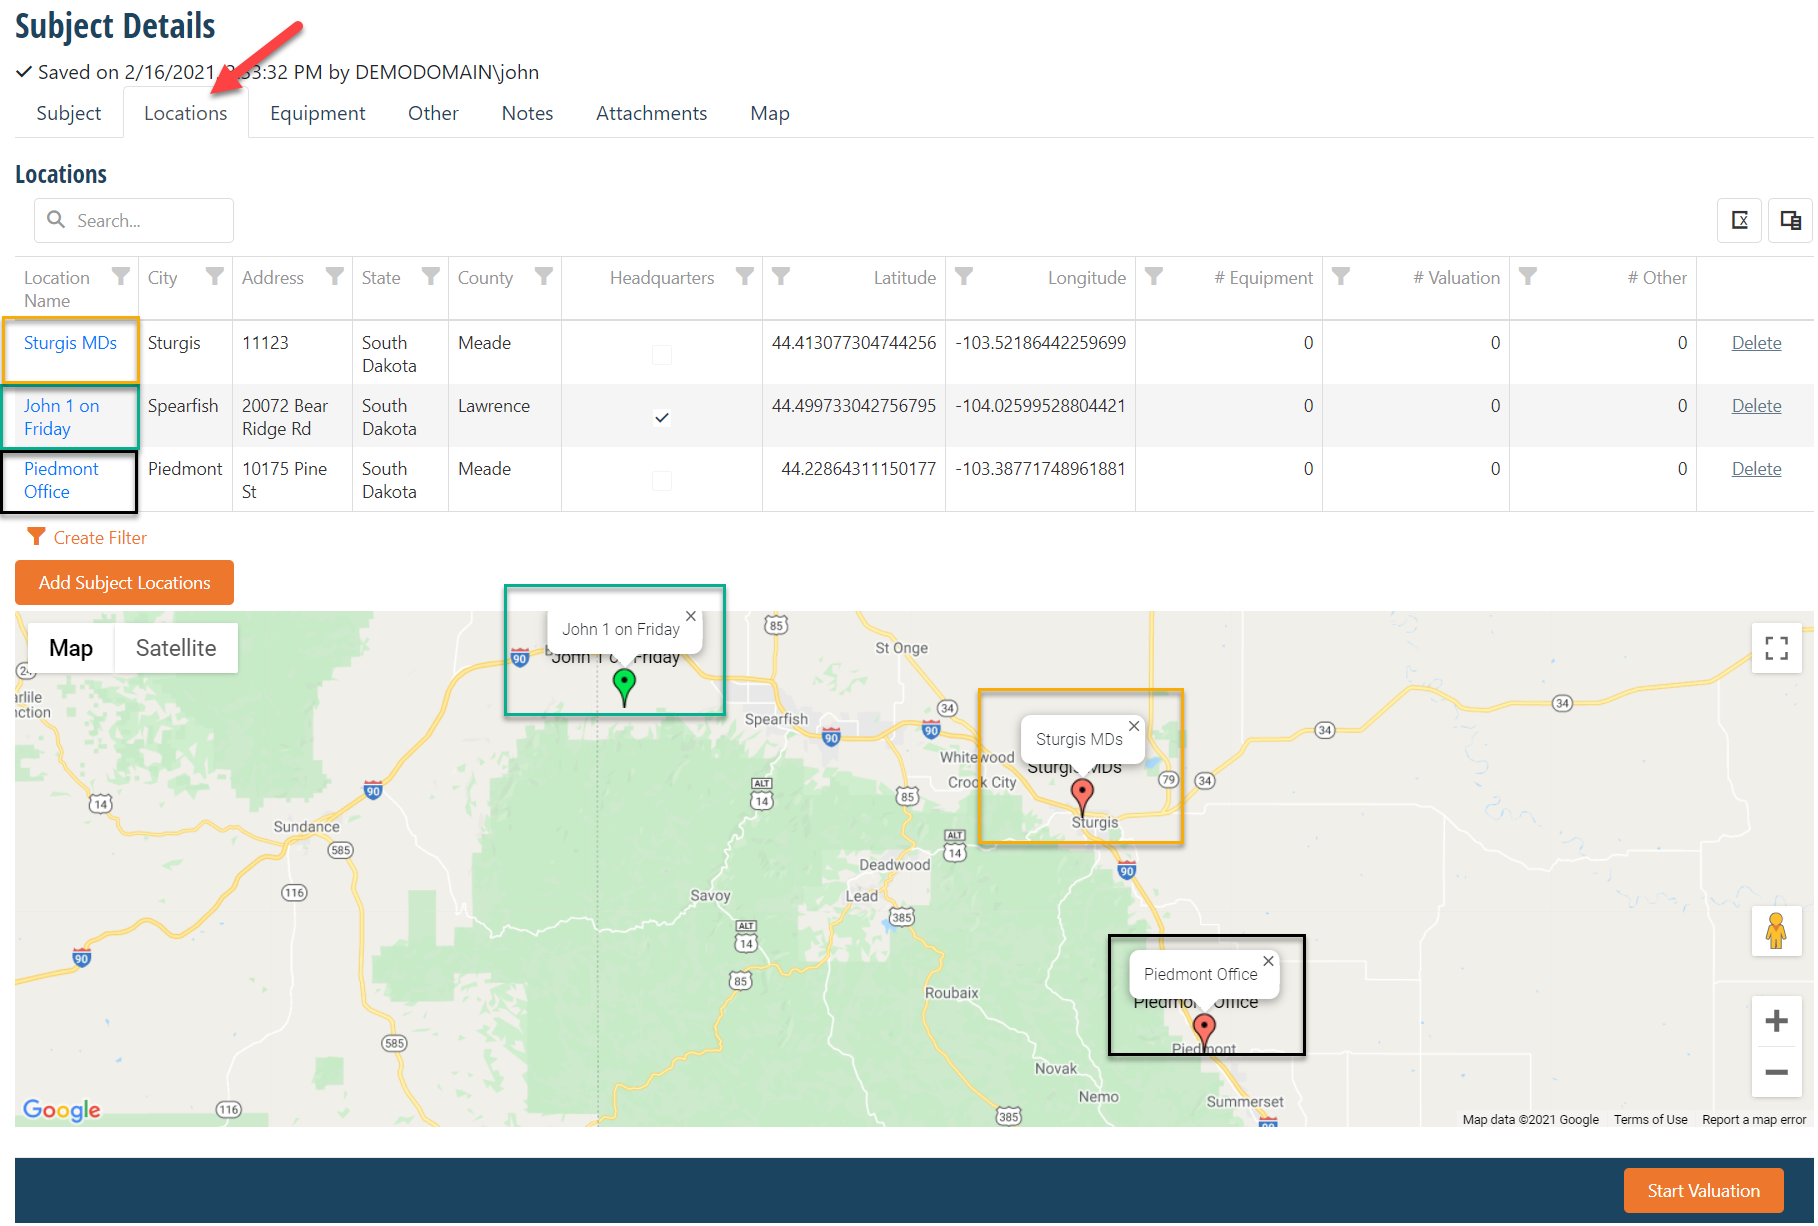
The next tab is "Locations" for geo-coding (one or more locations where the chattels are located). There are three (3) hypothetical and physically separated locations for this example that are coordinated by color. Once the grid locations are identified, go to "Add Subject Location" button (orange), then enter a "pin" for each chattel location. The lat/long will be entered from the pin reference point automatically.
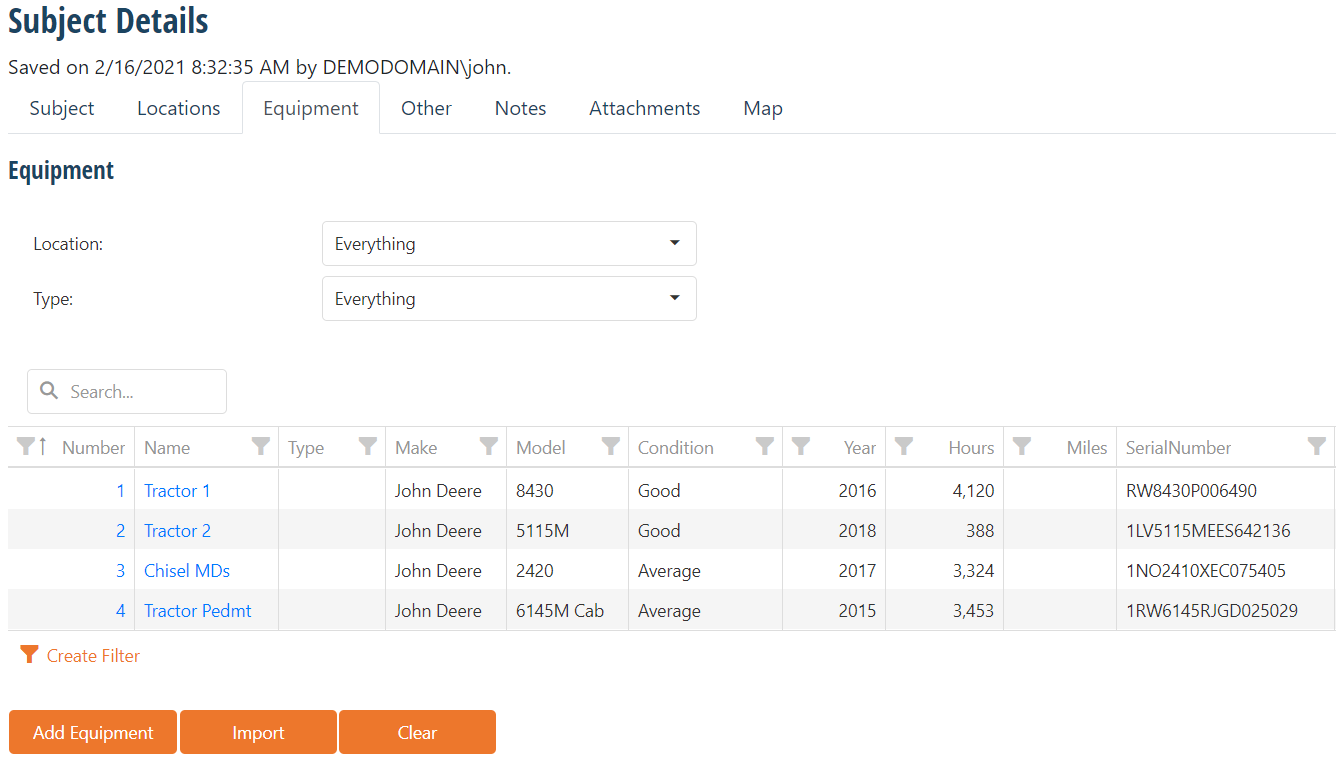
The next tab is "Equipment" where each is added manually --- or all equipment can be imported at once from an Excel™ spreadsheet or a "KML" file if it/they already exist.
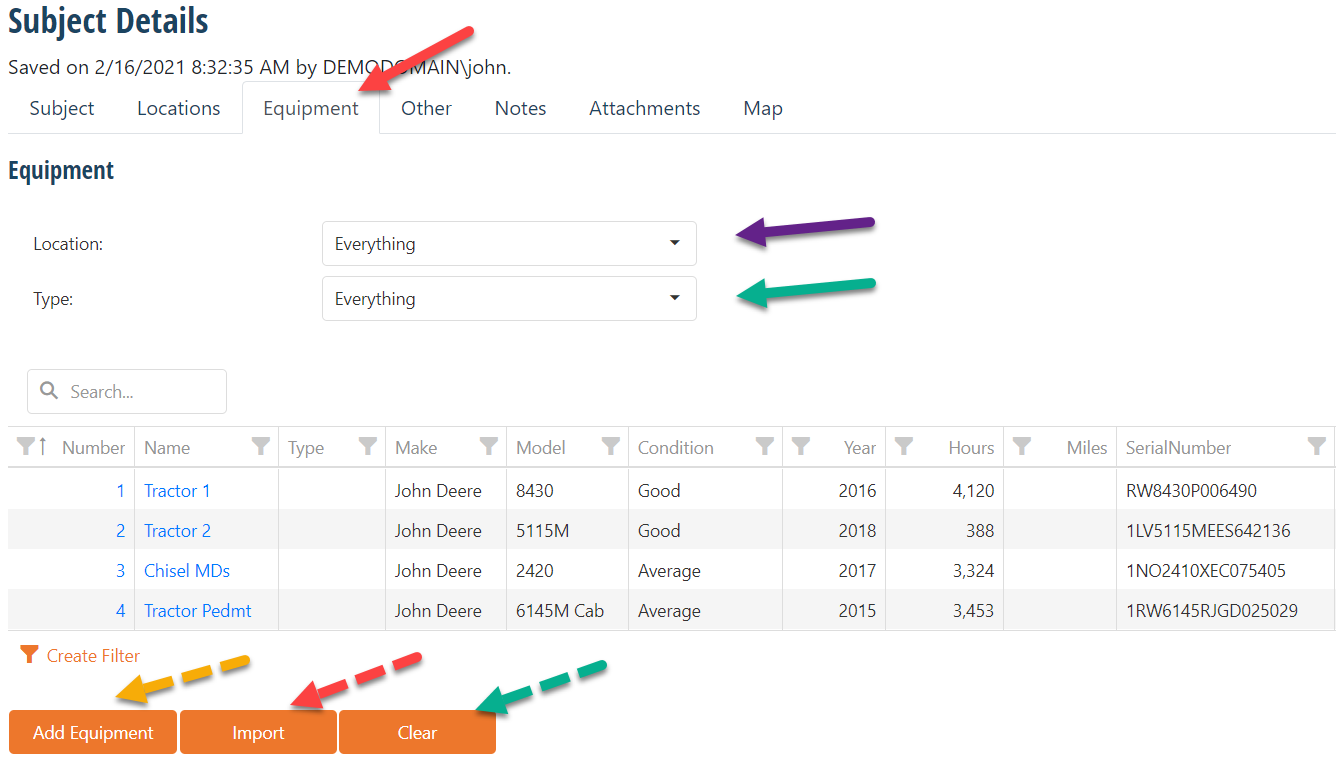
The direct entry option is "Add Equipment" (yellow dashed arrow bottom left). Each implement is entered one at at time --- see the next graphic below. However, the explanation for all other potential actions occurring on the visual continues.
The solid purple and green arrows show "filter" fields to synchronize the grid content for valuation. "Everything" was selected for both filters; thus, all four (4) pieces of equipment are shown in the grid.
1. The Location option can include multiple equipment locations for this ownership. Any specific location changes the grid to display chattels a single location.
2. The green arrow pointing to "Type" which will reveal a "grouping of similar chattels" --- say, "tractors" (there are three (3)). Note: the fourth entry is a chisel plow. If "tractor" is selected in the particular location, the three (3) tractors will be displayed. The reason to use the "Type" display is for linking to a "tractor website" for valuation comparisons. Simply, a tractor site would not have information for vehicles or other specialized equipment. Explanations how to enter and value things other than "tractors" will be discussed later as part of the "Model Setup".
3. The third option is hitting the "Clear" list after cloning a record or entering wrong items, then "Add Equipment" bottom where is screen is completed manually.
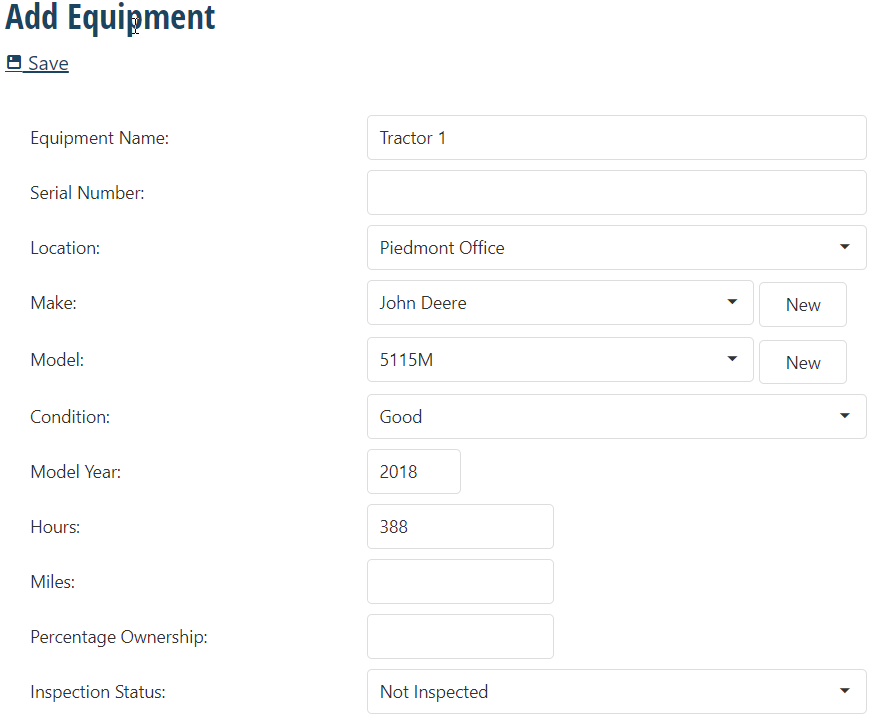
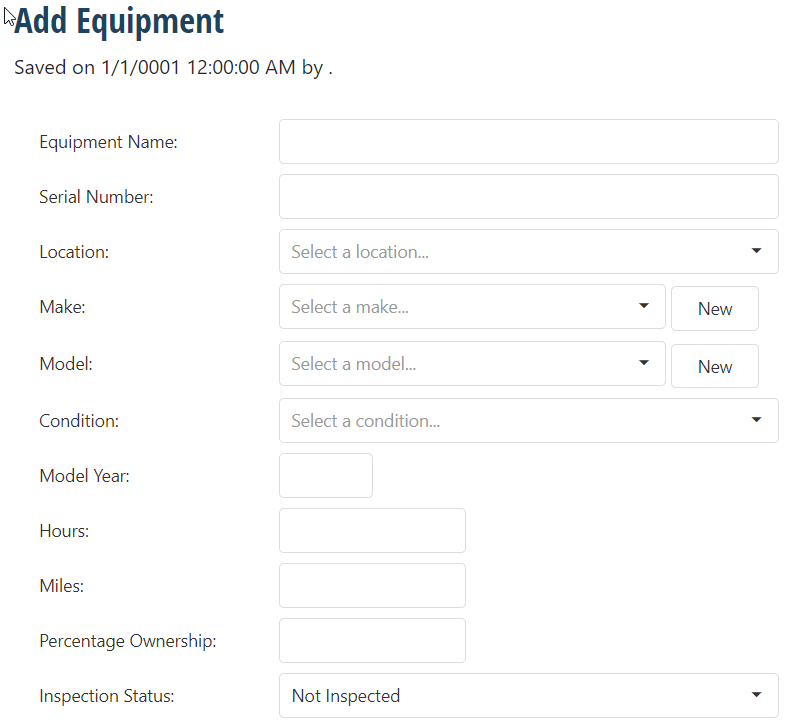
Note: the "Serial Number" is missing on purpose for this example, but will be need for the valuation process. This screen is completed again for the next implement, etc.
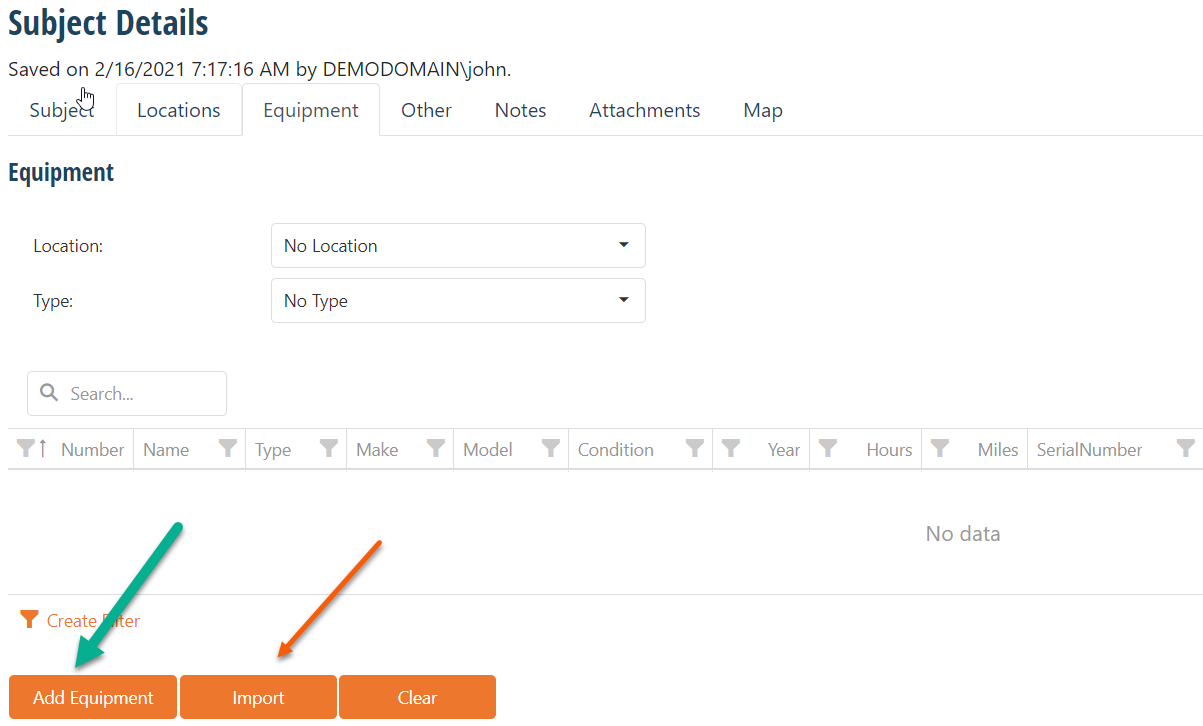
The second import method is "Import" (orange button) from a spreadsheet:
A second window opens:
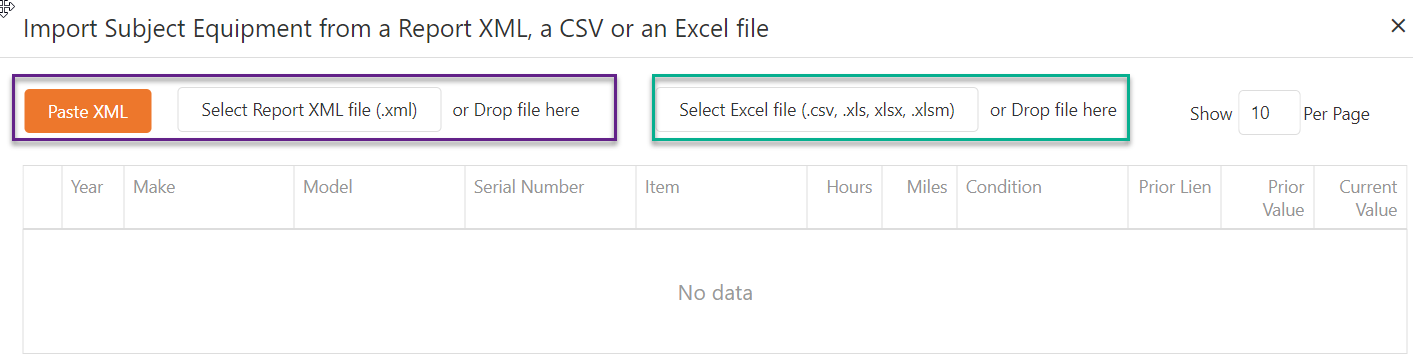
Select KML file (purple box) OR Excel file (green box) from your main devise, or drag-and drop that same file in the respective "Drop file here" box.
The third possibility is enter make/model/price one by one.....hit "Add Equipment" (green arrow two images above). A second screen opens:
A completed grid shown below for a HYPOTHETICAL Subject.
Subject's Chattels Valuation
NOTE: Things like pickups, trucks, or other "non-equipment" chattels will first have to be entered in the MODEL, then your appraisal added for those ---- after the initial group of chattels is valued and displayed.
A three-component tab opens:
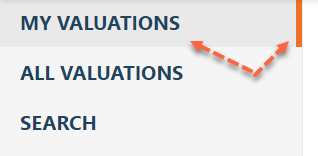
"My Valuations" displays only those appraisals you entered.
"All Valuations" includes all appraisals from multiple individuals feeding one organization.
"Search" option to find appraisals in progress or completed.
Subject Valuation REPORT
Search or completing a valuation for John's 1 on Friday shown below. The first tab is "Assignment Details" displaying the subject information entered throughout the process including the MODEL settings for the Type of Value, Definition of Value, etc.:

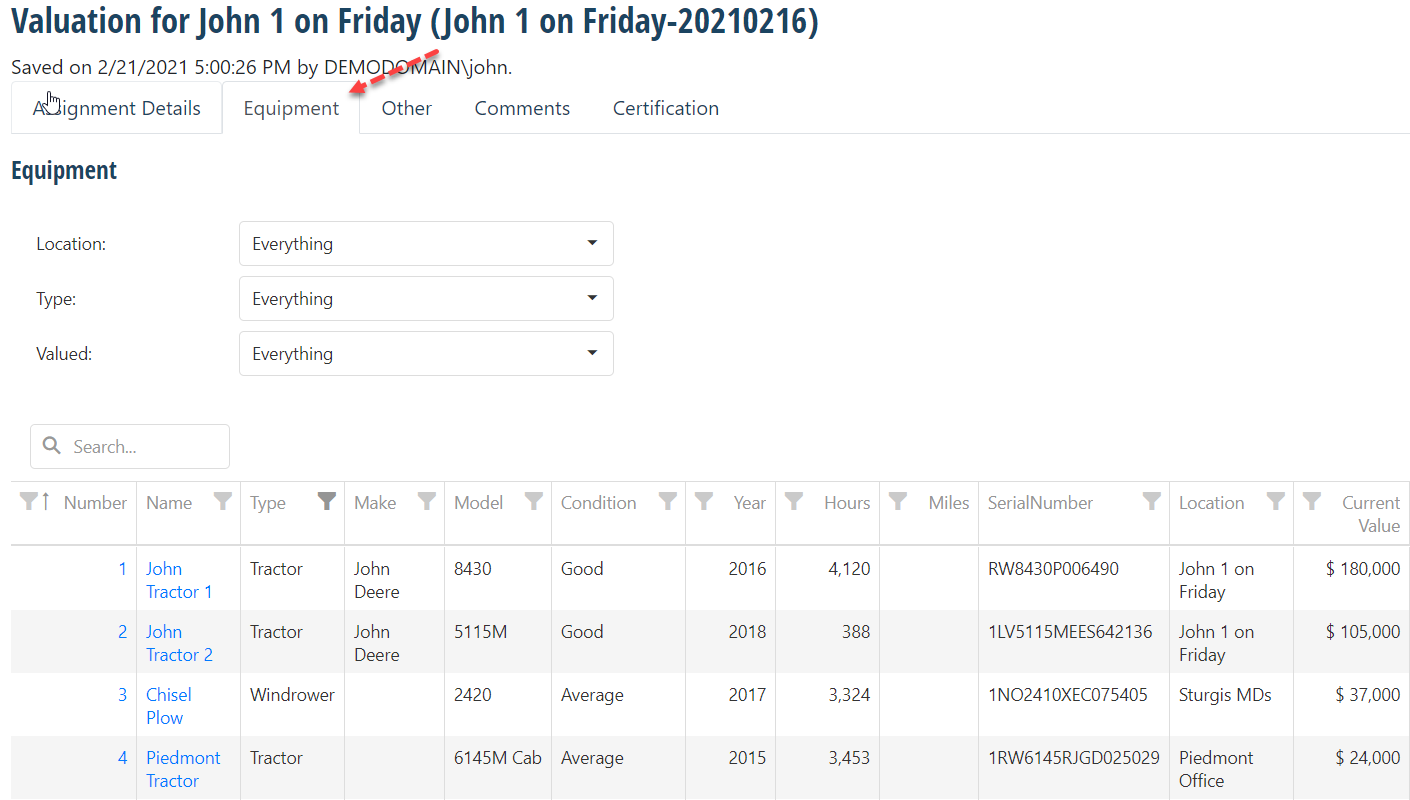
The "Equipment" tab shows the respective components with type, make, model, condition, year, hours/miles, serial number, and current value:
The "Other" tab is for anything not addressed previously. Note: livestock and others will be added in subsequent versions of the Chattels program.
"Comments" specific to the subject collectively are entered and transfer into the final report. Those pertain to any USPAP and other elements the appraiser is certifying to.
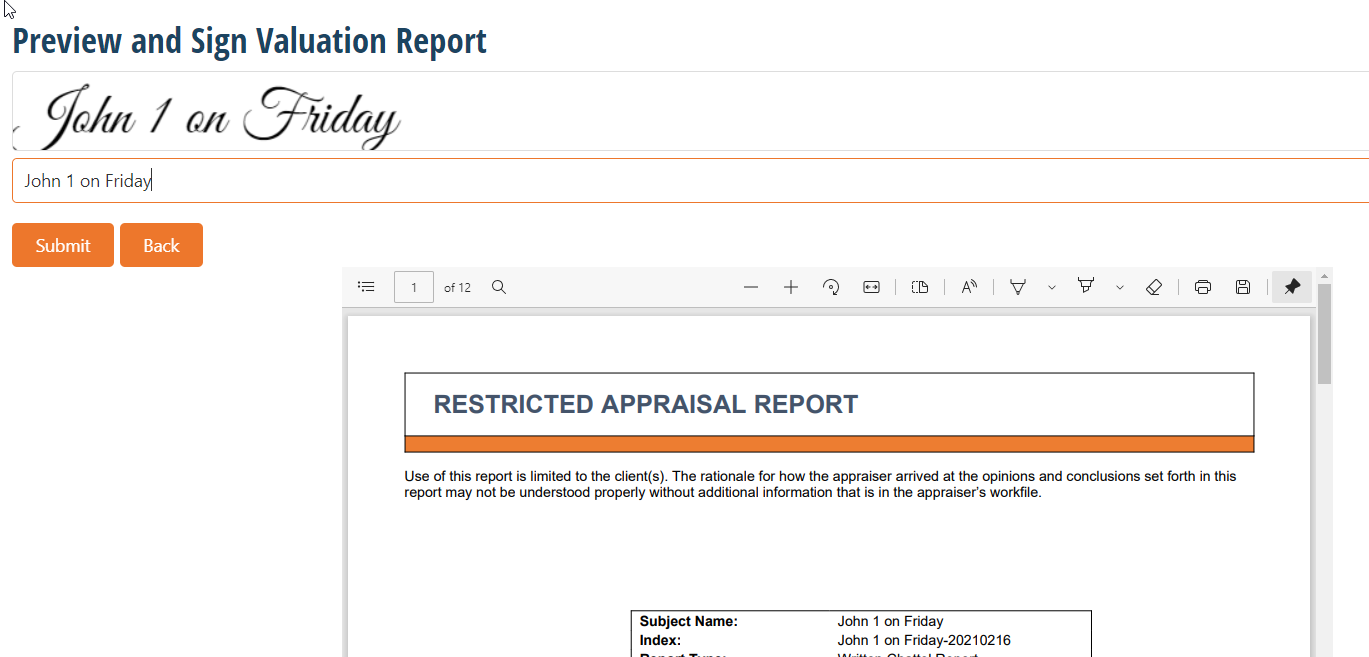
TO COMPLETE, hit "Preview Report" which is available at the bottom of each of the five tabs. Simply, a subject can be entered in draft, opened or accessed later and completed for the final report.
![]()
The final report is a PDF, like Maven. Part of the initial page is below. You can sign and finish the report.
That completes the WEB portion currently. The user can go into the field, prior to generating the report, take pictures and sync to the geo-coded locations and add field notes (once finished in the field, you'll upload the information back here to your web location and continue the valuation).