Enter a Subject

Subjects Tab
The second tab in Chattel is for entering specific "Subject" records (green arrow). Manually enter the Subject Name, pick the State and County in which it is located. The "CIF" and "LOAN #" may be used to identify a specific record.
The yellow arrow identifies three toggle options. Are "All" of the subject locations and records ready for inspection. By hitting "Ready", mobile devises can be sync with your main computer. As you take pictures in the field, they can be attached to each equipment record. Upon returning to the office and uploading your field entries, they are uploaded back into your main computer.
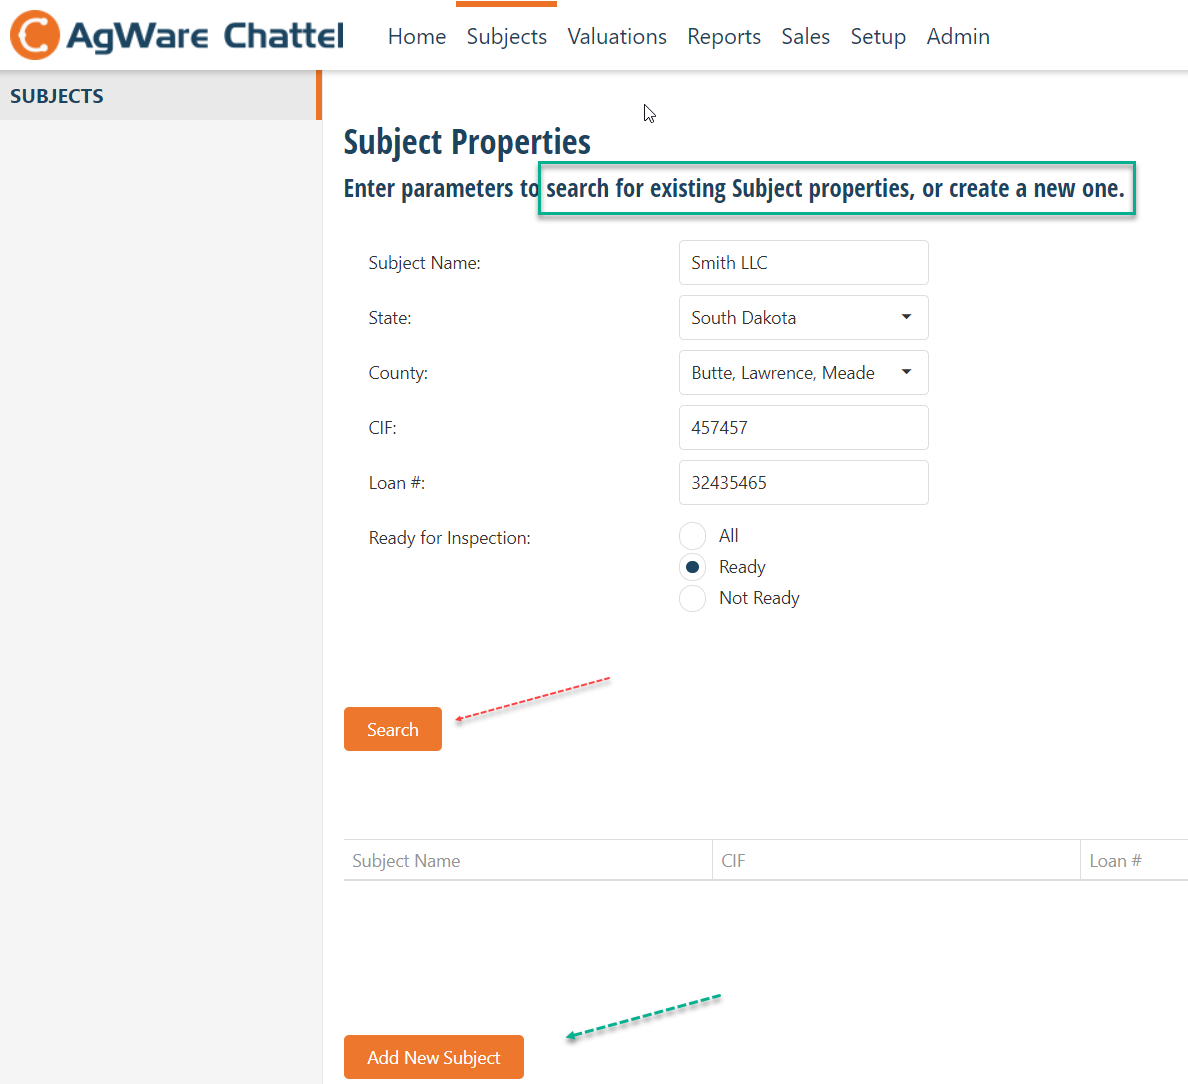
Enter the parameters for SEARCHING (red arrow) for existing "Subject" records, or to create a "new" record (green arrow).
The orange button (bottom left) can be used to enter yet another record, 3rd, 4th, 5th, etc., or multiple subjects that the user may elect to inspect during the next field-trip.
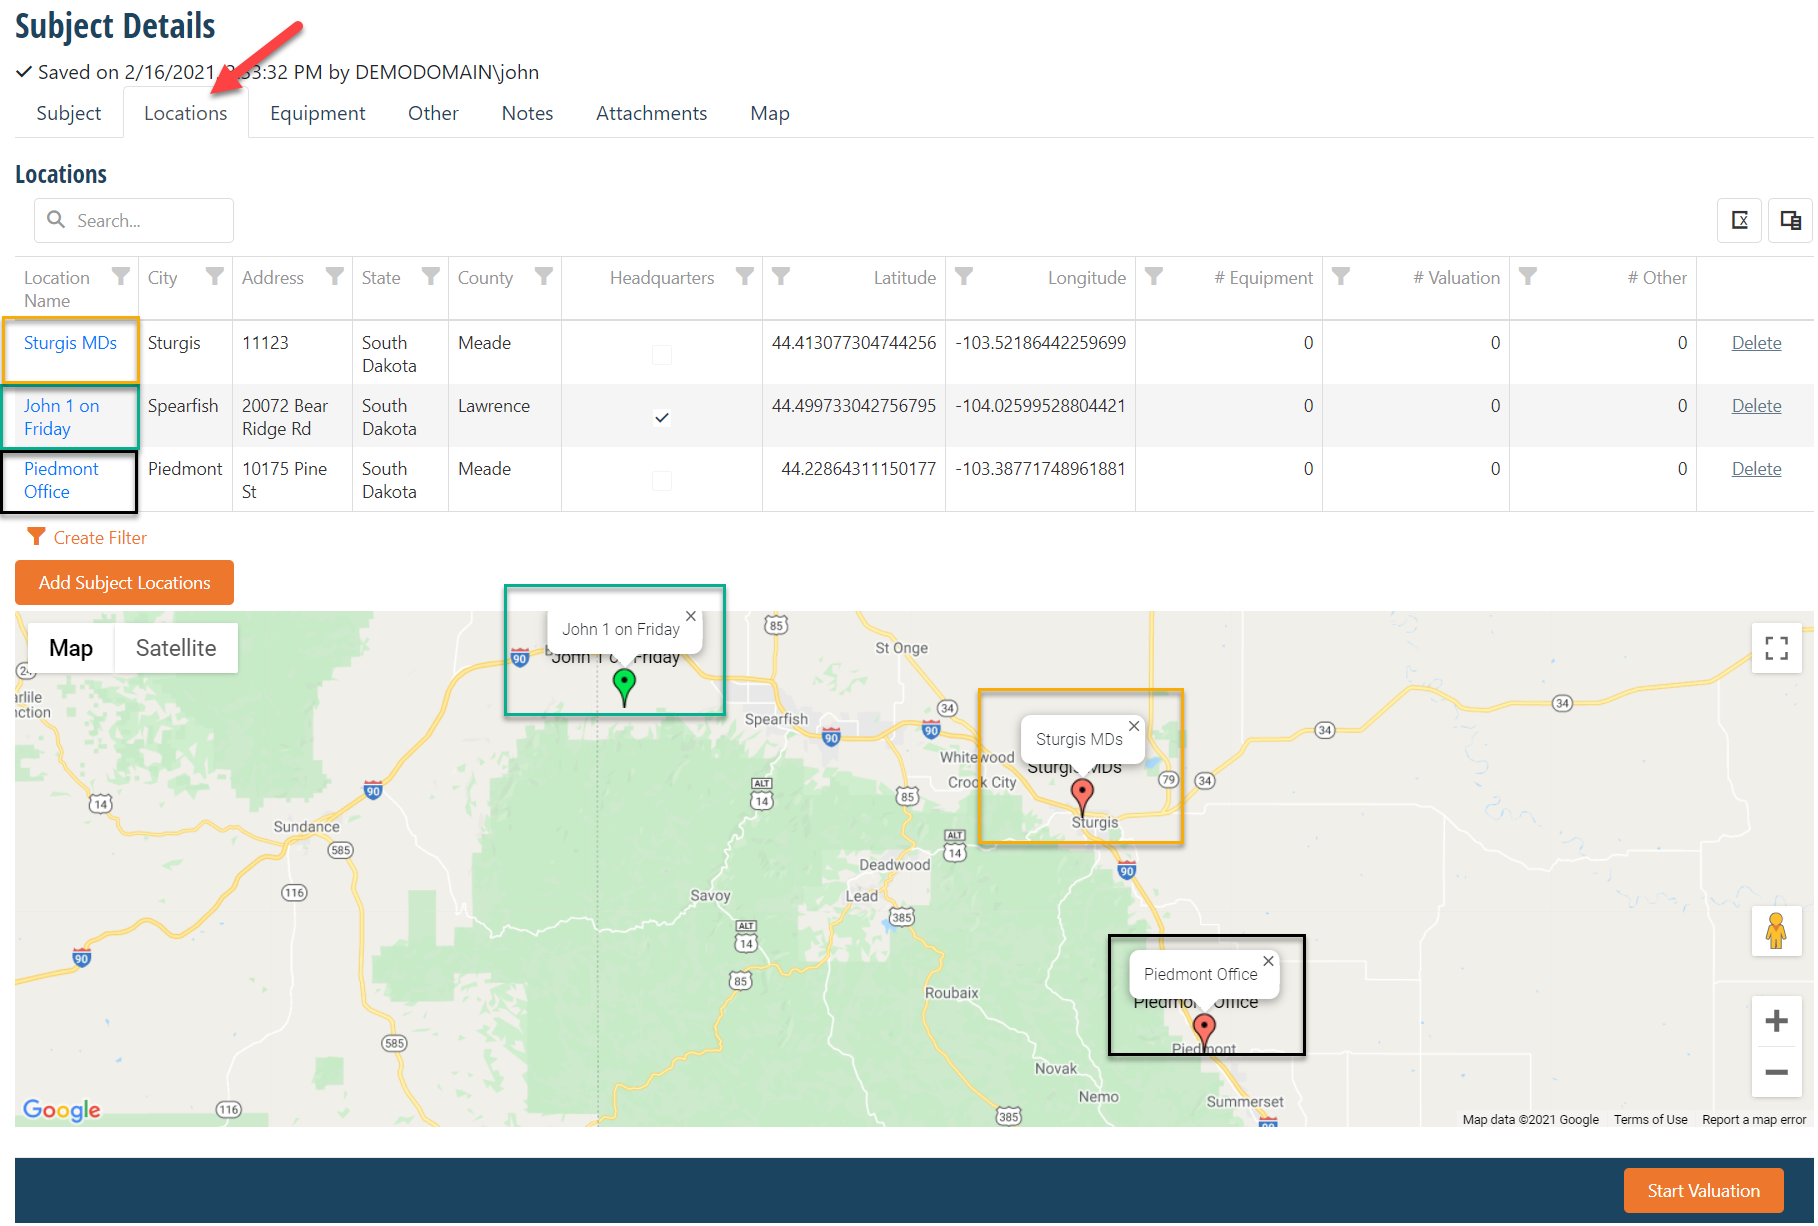
The next tab is the subject "Locations" tab for geo-coding one or more locations where the chattels are located. There are three (3) hypothetical and physically separated locations for this example that are coordinated by color. Once the grid locations are identified, go to "Add Subject Location" button (orange), then enter a "pin" for each chattel location. The lat/long will be entered from the pin reference point.
The next tab is "Equipment" where each implement can be added manually one at a time or imported from a group already in Excel™ spreadsheet. Add the "Location" of the equipment (multiple locations are possible for the same owner like the example below shows below) or select and value the equipment in just one location within multiple locations held by a single owner.
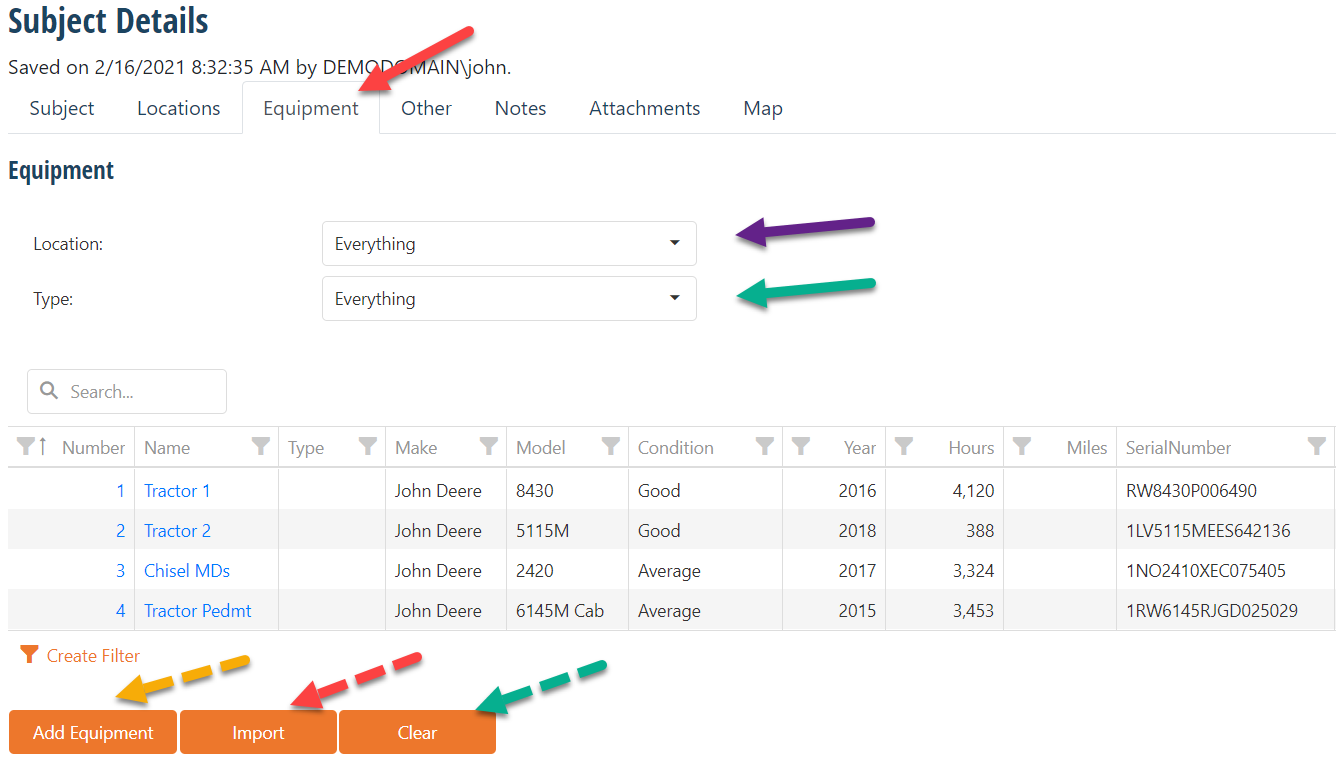
The second and direct entry option is "Add Equipment" (yellow dashed arrow bottom left). Each implement is entered one at at time --- see the next graphic below. However, the explanation for all other potential actions occurring on the visual continues.
The solid purple and green arrows show "filter" fields to synchronize the grid content for valuation. "Everything" was selected for both filters; thus, all four (4) pieces of equipment are shown in the grid.
1. The Location option can include multiple equipment locations for this ownership. Any specific location changes the grid to display chattels a single location.
2. The green arrow pointing to "Type" which will reveal a "grouping of similar chattels" --- say, "tractors" (there are three (3)). Note: the fourth entry is a chisel plow. If "tractor" is selected in the particular location, the three (3) tractors will be displayed. The reason to use the "Type" display is for linking to a "tractor website" for valuation comparisons. Simply, a tractor site would not have information for vehicles or other specialized equipment. Explanations how to enter and value things other than "tractors" will be discussed later as part of the "Model Setup".
3. The third option is hitting the "Clear" list --- likely after cloning a record or entering wrong items, then "Add Equipment" bottom where is screen is completed manually.
Note the "Serial Number" is need for the valuation process. This screen is completed again for the next implement, etc.
Also, the grid can be manually changed from cell to cell once the information is initially entered or imported.
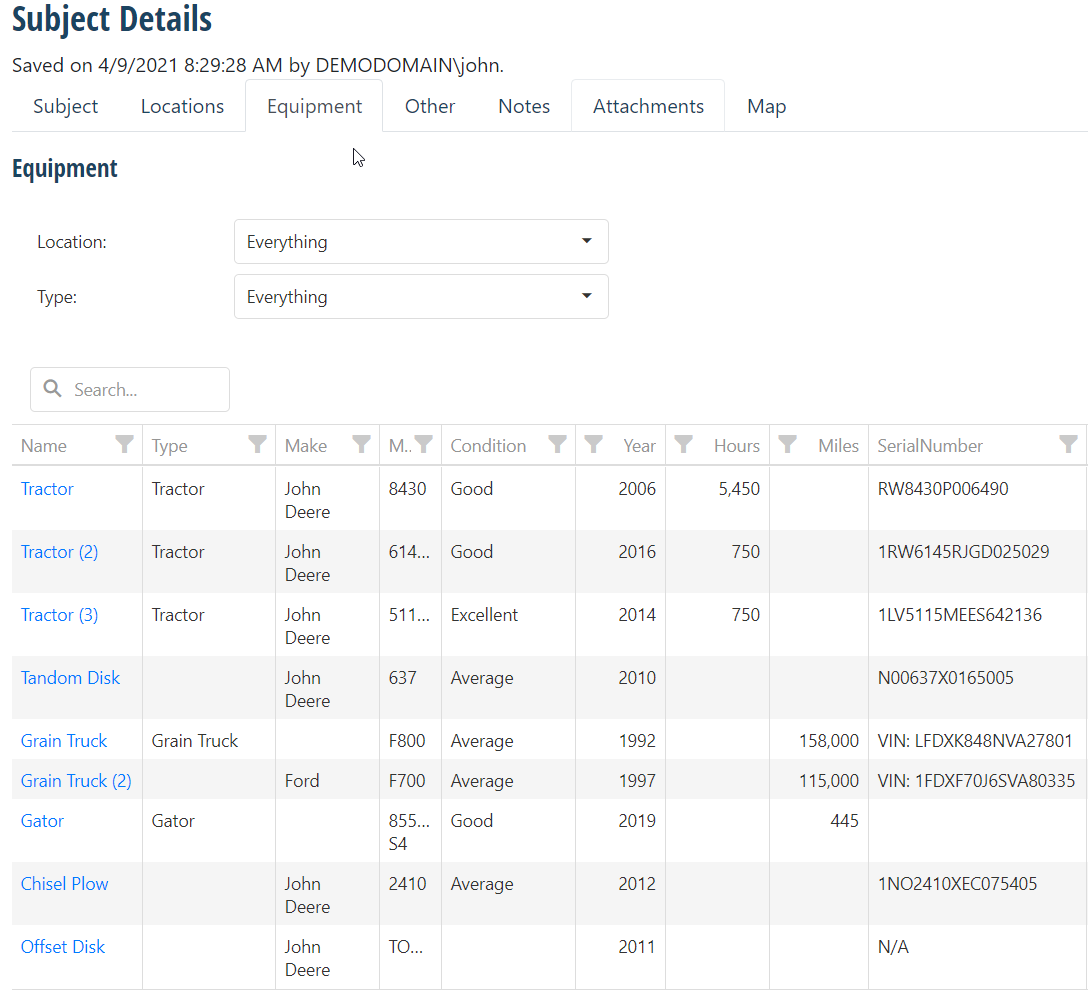
Completed Record (option)
That completes the WEB portion for now. The user can go to the field, take pictures and sync to the geo-coded locations and add field notes (once finished in the field, you'll upload the information back here to your web location and continue the valuation).